The Parts and Steps to Building a Computer for Cheap
Buying an out-of-the-box computer is an easy path to computer ownership. But those who know how can build their own computer, and can sometimes save some money in the process. The joys of building a computer from the ground up, coupled with the exhilarating performance rates that it usually yields make it all worth the sweat. We’re going to go into the process of building your very own computer for relatively cheaper than it would set you back if you were to buy one already assembled.
To start, you should be determined to see the process through. This entails learning about new components on the market while negotiating performance for price whenever possible. Be sure to compare the total price of the components you find with complete computers to make sure that you’re getting the better deal.
Since we’re focused on savings, performance levels of the end build will not make your peers drool as much as they envy your determination to see such an endeavor through.
Let’s dive right in!
Breaking Down the Parts that Make up a PC
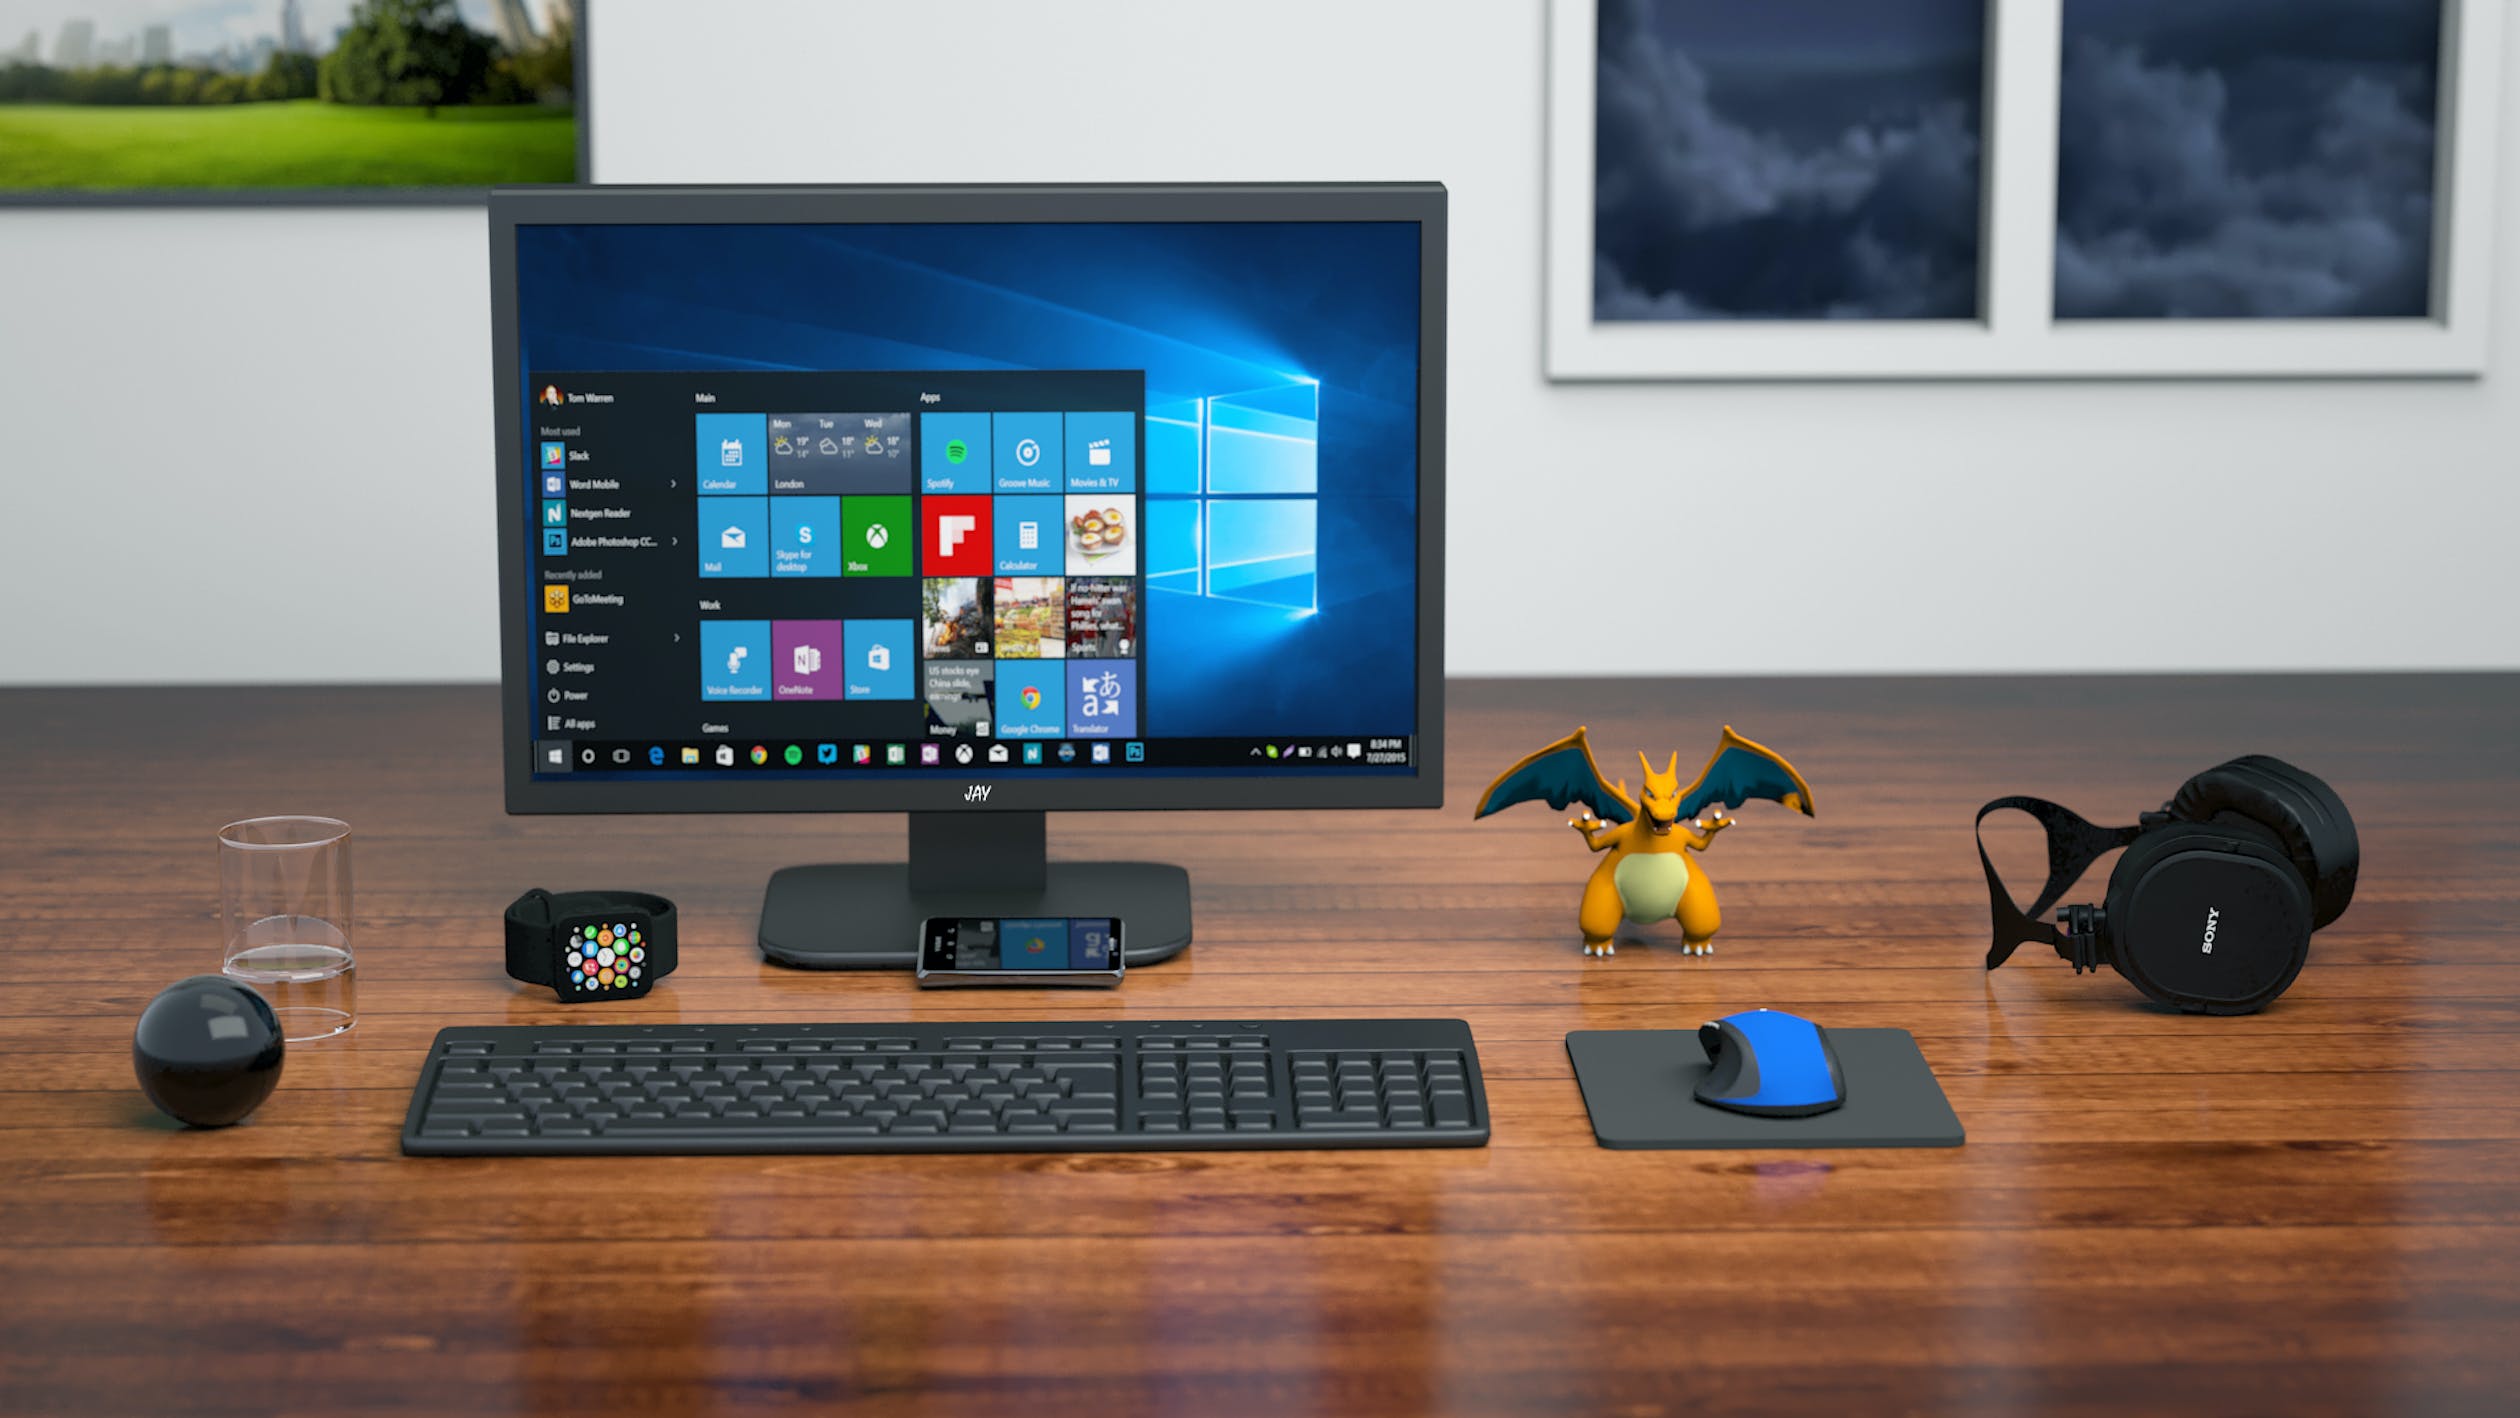
Looking from the outside, the major components that make up a PC include the following;
- A Monitor
- A Keyboard
- A Mouse
- The CPU (Central Processing Unit)
- Several cables connecting the CPU to the peripherals
Most of these are self-explanatory. When we talk about building your own PC, it’s all about the components that make up the CPU.
Inside the CPU
The rate-determining step for this entire process has to be building the CPU. For that you need the following components:
- A Processing Chip – you’ll only need one of these if we’re going to stay on the cheap side of things. It is essentially the brain of the computer, which makes it impossible to skip.
- A Motherboard – This is the circuit board that houses all the components and connects them for proper function. More like the skeleton frame for the CPU.
- RAM (Memory Cards) – Think of these chips as the thinking space available to the processor. The more RAM you have the faster a computer interacts with you – and vice versa.
- A Network Card – Unless you plan on keeping the PC offline (people are doing this), this card is necessary.
- A Power Supply Unit (PSU) – This component regulates electrical input from the mains to protect the delicate circuitry on the motherboard.
- A Graphics Card (GPU) – These work almost the same way as RAM, only dedicated to the rendering of images (output) on the monitor.
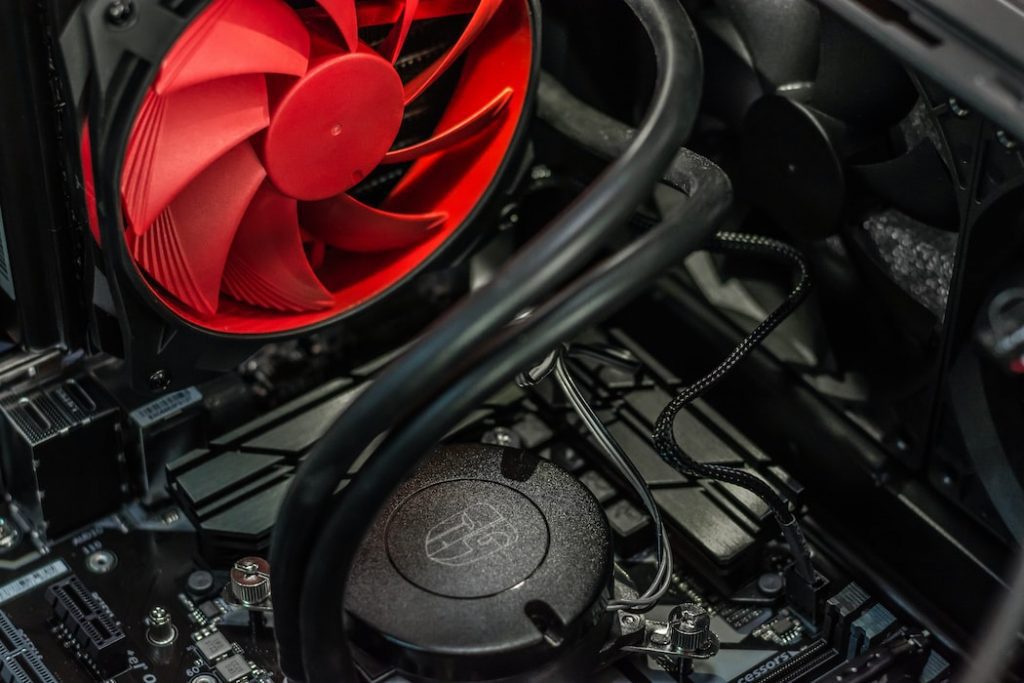
- Cooler (The Fan) and Cables – Since we’re building a cheap machine, you might need to squeeze the most performance from the processor, this increases the heat dissipated, hence the cooler. You will also need SATA cables to connect the motherboard to the storage devices. How many depend on the storage devices you eventually purchase.
- Storage Drives – These will store your data and also host the operating system for the entire system to have an environment in which to operate.
Step 1. Buying the Components
Cheap is a relative term. While some of you will look to make a basic gaming rig with the least expensive gear, others will opt to adjust here and there to keep the price low while pulling up the spikes on graphics performance. Look for online retailers that sell these computer components separately.
If you only look at the latest components, chances are you will crash into the high-end versions and ultimately overshoot your budget. Since we’re going for the cheapest components, we’ll be overlooking the process of upgrading each of these up to you since after these steps you will be well versed with the process.
The Motherboard – Analogous to the skeleton, the specifications of this component determine much of the end product’s performance and structure. There is a wide array of affordable motherboards (MOBO) on the market. Your other components must be compatible with this.
The RAM – Just because you know that the more RAM you buy the faster your PC will run doesn’t imply you hoard. The wisest thing to consider first is which Operating System you’re going to install to run programs. Some Operating Systems (OS) before Windows 10 OS had ceilings that limited the amount of usable RAM regardless of how many sticks were used.
Storage Devices and The Processor – You will need just a single unit of each of these components. To keep it simple, your options for the device boil down to a Hard Disc Drive of reasonable capacity. A 500 Gigabyte capacity will do, for now, both for price considerations, and also because it’s more than enough. The processor type you buy is determined by the motherboard purchased. Some motherboards are only compatible with the AMD variant of processors, with the other end allowing you to use only the Intel processors. The pricing is nearly the same for the basic low-end processors. Perhaps more important is the difference between AMD and Intel processors.
The Network and Graphics Cards – Very basic network cards will do. All you need from them is a port that connects to the router using an ethernet cable. There are wireless variants to these, which are slightly costlier; so we’ll stick with the cheap one. Some more recent motherboards come stock with network cards, making them worth noting the price difference after all is summed before pouncing on the components. Since we’re not looking to build a bitcoin mine, a single graphics card will do.
Power Supply and Chassis (Case) – You may have seen computer cases that look fit to keep pets in, with colorful lights and water tubes; forget that. A very basic computer case does the same job without the glitter. The same can be said about the power supply unit. Many makers have carved out different niches through marketing jargon that you can translate back to the very same reason each of these units was made in the first place.
Compatibility shouldn’t be a big issue, drivers for each of these components bought from third-party vendors are available with the packaging, otherwise, you can download them from the device manufacturer’s website.
Step 2: Mounting Components Together – Processor First
Starting with the motherboard on a flat surface, the processor goes into position first. Depending on the variation of the motherboard, some click into place, while others are sled-held into position with the heat-releasing side facing up.
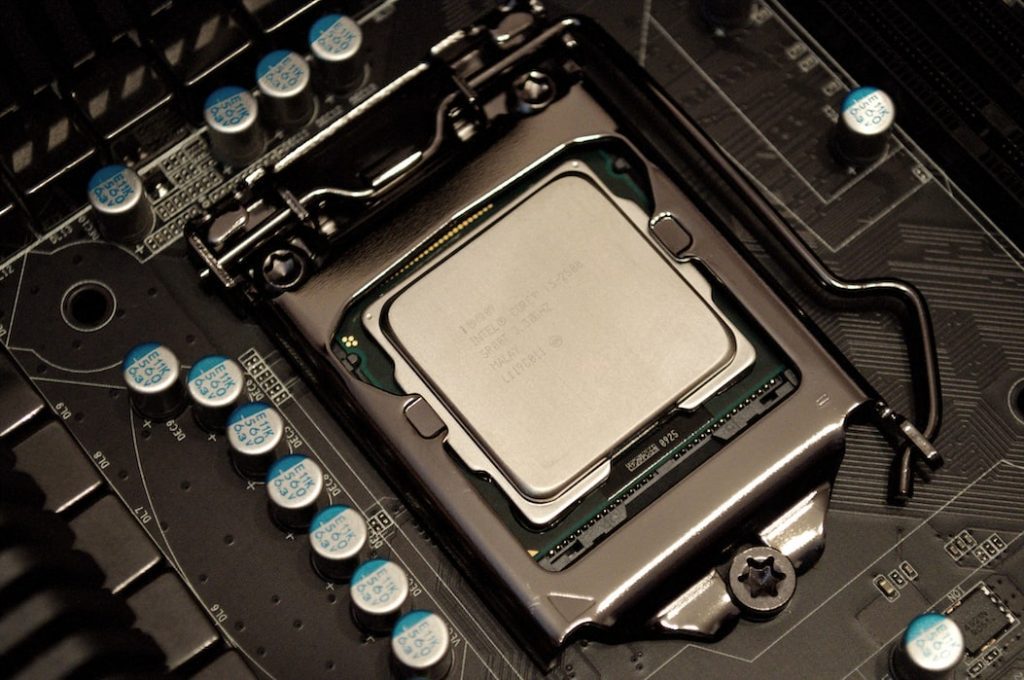
The manual for the one you buy will let you know which side goes up. Hint: make sure to avoid touching the processor on the top and bottom, the sides will do. This avoids interfering with its optimal performance with fingerprints all over it.
Step 3: The Cooler, Graphics Card, and RAM
On top of the processor is mounted a cooling fan. Special gel provided with the fan is pea-size dotted on the processor to increase the efficiency of the fan in carrying heat from the system. Once the fan is screwed onto the motherboard, the RAM chips can easily be clipped into position. While this is a relatively easy task, the slots are in danger of being blocked by overly large cooling fans. Assuming you stuck with the cheap ones, this should not be an issue.
Step 4: Mounting the Chassis
With the Case lying on its side, carefully mount the motherboard into its designated screw holes to hold it snug in place, making sure that any connectors protruding out of the back are aligned with their respective openings. While still focusing on the case, this is an opportune time to slot in the hard drive(s) purchased alongside the power supply.
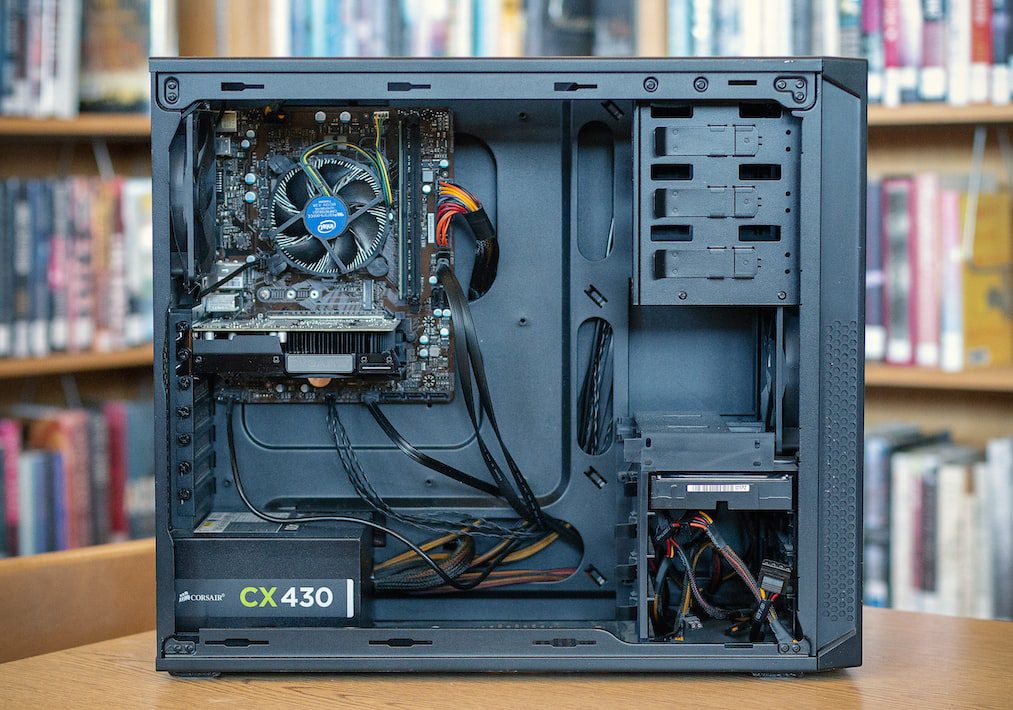
You will notice slots in the chassis corresponding to the sizes of each of these components. The key is to fasten the screws holding them in place such that they don’t vibrate when the computer finally starts running.
Step 5: Fixing Cables Into Place
Depending on your choice of motherboard, you will notice several slots corresponding to the SATA kind. These are designated for the hard drives to feed data into the motherboard. Use them. Together with these, slot the power cables from the power supply into the hard drive so that they have the current to spin their internal disks. If the motherboard purchased already had a network connectivity unit, then all is set. Otherwise, this component is installed as easily as the rest were slotted into their respective positions. After each cabled component has a power connection from the power supply, and the card components have been fastened into place, it is time to close the computer case and prepare for the first switch-on.
The final phase of the project involves loading the operating system onto the hard drives through either a USB drive or a disc inserted into an external optical drive. If done properly, all performance properties of the components can be tested by exerting software program stress onto the computer. Should you need to upgrade each component at a later time, it is a matter of purchasing compatible parts and updating the operating system with corresponding drivers. After the first time, it gets easier. Go on, give it a go!